
The FedEx driver popped up at my front door unexpectedly. I didn’t realize that the fermentor would get here so soon after I ordered it. I was busy with work though, so I asked the driver to drop it in the driveway.
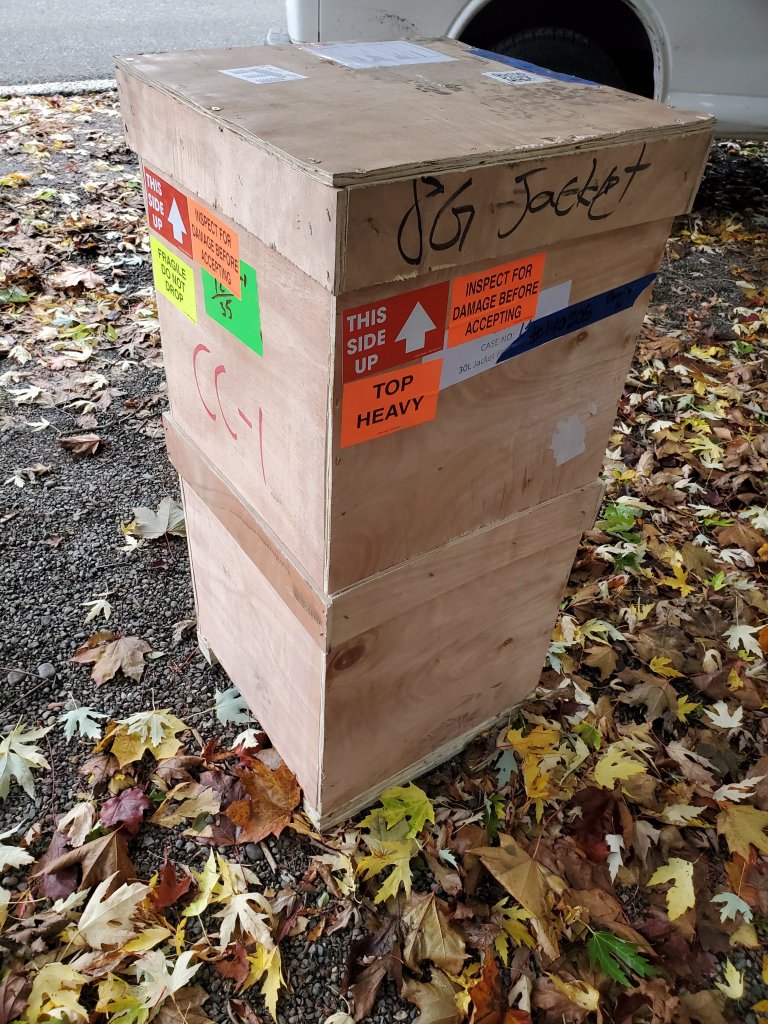
So I had a crate. I thought it’d be strapped to a pallet, but a crate is nice.
So I suppose I have to uncrate this.
But how does one uncrate something? Spoiler alert: I have already done it, and I am still unsure I did it correctly. But to preserve the crate in case I needed it later, I tried to be careful.
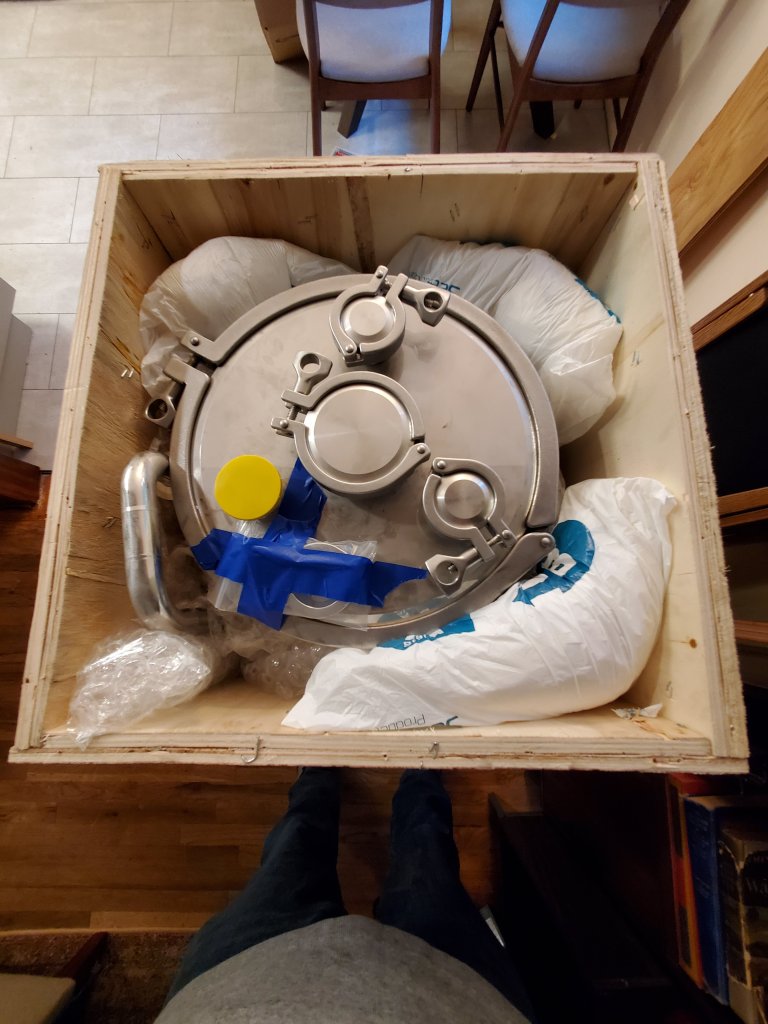
First thing I did was look for screws. The only screws I could find were on the lid. I grabbed my rusty screwdriver and removed the dozen or so screws and saw the top of this thing. First thought: wow, this is shiny. Second thought: holy crap that is a big clamp!

So then came the hard part: identifying a side to take off. I went with one of the two inset sides, and with a flat blade screwdriver and a hammer, I took out twenty or so staples. It probably took half an hour to get to this point. But once I had the side off, I was able to admire the packing job.
The crate was built specifically for this fermentor, and it showed. The unit was snuggled into the crate with just a few tight layers of bubble wrap. The top was held in place with expanding foam bags. Unsurprisingly, there were no dings or scratches at all in the finish that I could find. Brewer’s Hardware used blue masking tape to hold the bubble wrap on which is nice because it is relatively easy to remove and leaves no residue.
The lid is one of the most impressive parts. It is essentially a 12in TC adapter with three 1.5in and a single 3in TC flanges. This may seem like a lot, but the number is tempered by the lack of a side mounted thermowell, so one flange would be taken up for that. Blowoff will consume another, leaving a single 1.5 and the 3. Speaking of blowoff, the fermentor comes with a right-angled hose barb but one can opt for the $150 stainless blowoff cane that they produce in shop.

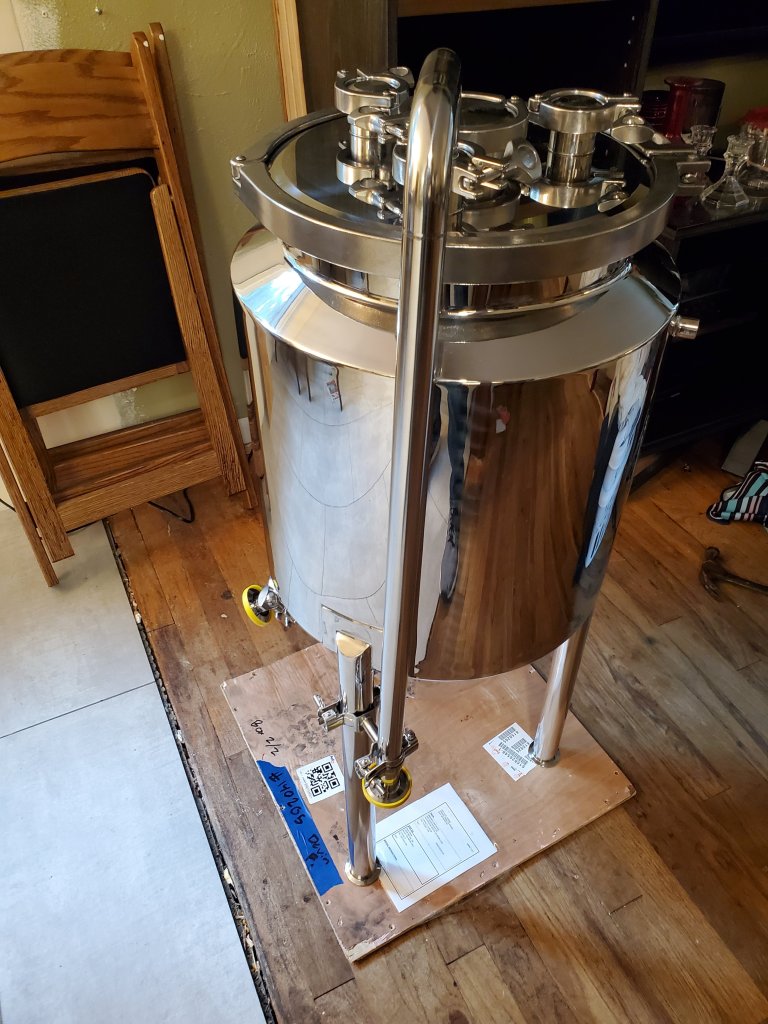
It includes a 1.5in TC dump valve and rotating racking arm, which uses o rings to help prevent leaks since the TC clamp has to be loosened for the arm to rotate. They also provide a seal that is made from a harder material that will rotate better.

Additionally, the fermentor comes with extra clamps, two 3 position butterfly valves (one 1.5in and one 1in) for the dump and the racking arm and extra gaskets.
In addition to the blowoff tube, I also ordered the optional casters. According to the website the unit is 80lbs dry, but I assume that is just the vessel with no valves or accessories. That is lot of weight in my garage to not have the flexibility to move around. Oddly, when I went to install the casters I found out that two out of three legs were stuffed with foam. I have no idea why. About five minutes with a pocket knife fixed the foam problem and was able to knock the casters in with a rubber mallet.

That is about it for the unboxing experience. Next I’ll write up the setup, and then go over the temperature control bits.
